

Table of Contents
Homemade Chocolate Cake That Will Blow Your Mind
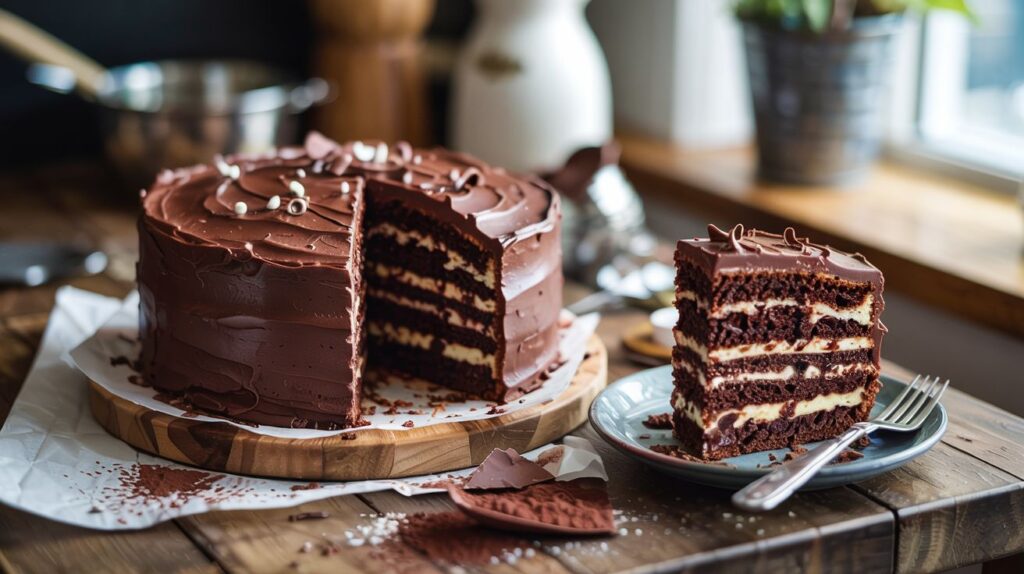
There’s something truly magical about a homemade chocolate cake—especially when it’s rich, moist, and made from scratch with simple ingredients. Whether you’re a seasoned baker or just starting out, this cake is bound to become a staple in your kitchen. Picture this: a soft, fluffy cake with a deep chocolate flavor, topped with a creamy frosting that melts in your mouth. It’s the kind of dessert that makes every occasion a little sweeter and every bite feel like a special treat. So, if you’ve ever craved a chocolate cake that will truly blow your mind, you’re in the right place. Let’s dive into the world of easy baking, where delicious homemade creations are just a few steps away!
Key Benefits
There’s nothing quite like the magic of a homemade chocolate cake. Not only does it bring the rich, indulgent flavor of chocolate to life, but it also offers a sense of accomplishment and warmth that store-bought cakes just can’t replicate. Here’s why this homemade treat will quickly become your go-to dessert:
- Rich Flavor: When made with quality ingredients like cocoa powder and dark chocolate, this cake delivers a deep, satisfying chocolate taste that will have your taste buds dancing. No store-bought version can match that level of decadence.
- Moist and Fluffy Texture: One of the secrets to an unforgettable chocolate cake is achieving the perfect balance of moistness and fluffiness. The combination of buttermilk or coffee in this recipe helps enhance both the flavor and the texture, ensuring each bite is soft and melt-in-your-mouth.
- Easy to Make: Despite its impressive results, this cake is surprisingly simple to prepare. The ingredients are basic and the steps are straightforward, making it accessible to both baking beginners and seasoned pros. With just a few key tips, you can achieve a bakery-quality cake right at home.
- Customizable to Your Liking: Want to make it extra special? Add chocolate chips for an added burst of sweetness, or sprinkle in some nuts for a bit of crunch. You can also experiment with different frosting options like buttercream or ganache to suit your preferences.
- Perfect for Any Occasion: Whether you’re celebrating a special event or just craving a slice of something sweet, this cake is versatile enough to be served year-round. It’s perfect for birthdays, family gatherings, or simply enjoying with a cup of coffee after dinner.
This homemade chocolate cake isn’t just a treat—it’s an experience. From the moment the cake starts baking in the oven to the first bite, it’s bound to bring smiles and create lasting memories. Ready to dive in? Let’s get started on making the cake of your dreams!
Ingredients
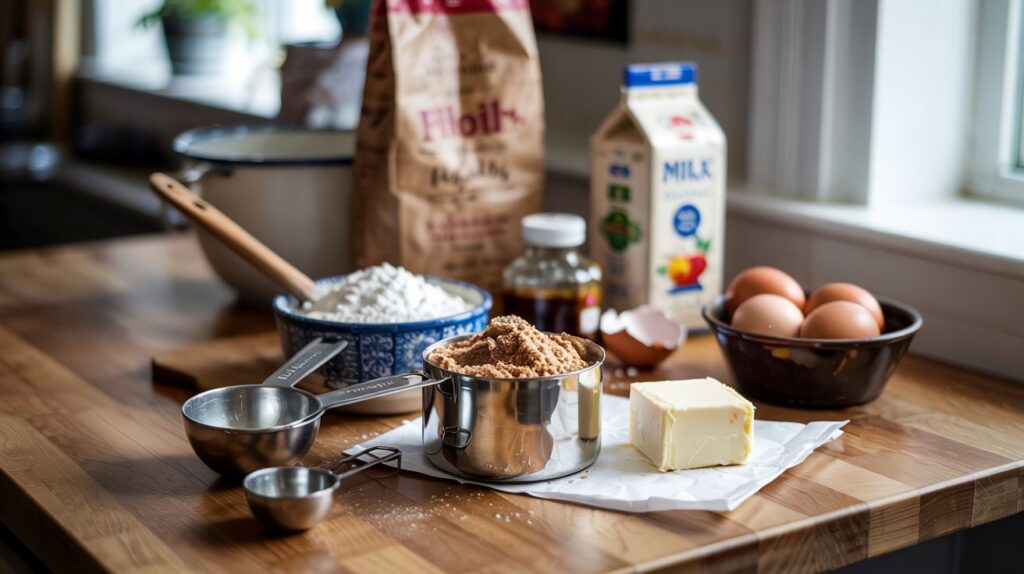
The beauty of this homemade chocolate cake lies in its simplicity. You don’t need a long list of fancy ingredients—just a few pantry staples that come together to create the perfect chocolatey treat. Here’s everything you’ll need:
- 1 ¾ cups all-purpose flour: This is the base of your cake. For a lighter texture, you can sift the flour before using it.
- 1 ½ cups granulated sugar: This will give the cake a nice sweetness. You can substitute part of the sugar with brown sugar for a slightly richer flavor.
- ¾ cup cocoa powder: Make sure to use unsweetened cocoa powder for the best flavor. It adds the rich, deep chocolate taste that makes this cake so irresistible.
- 1 ½ teaspoons baking powder: This helps the cake rise and gives it that perfect fluffy texture.
- 1 teaspoon baking soda: This, in combination with the cocoa powder, ensures your cake achieves the perfect texture and rise.
- 1 teaspoon salt: A pinch of salt enhances the flavor of the chocolate, balancing the sweetness.
- 2 large eggs: Eggs help bind the ingredients together and provide moisture, resulting in a soft and tender cake.
- 1 cup whole milk: Adds moisture and helps achieve a smooth batter. You can also substitute this with buttermilk for a slightly tangier flavor.
- ½ cup vegetable oil: The oil ensures the cake stays moist and tender, giving it that melt-in-your-mouth texture.
- 2 teaspoons vanilla extract: This adds a subtle warmth and depth to the flavor of the cake, complementing the chocolate perfectly.
- 1 cup boiling water: This may seem unusual, but adding boiling water to the batter helps dissolve the cocoa powder, creating a silky-smooth texture that’s key to the cake’s success.
- Optional: Chocolate chips or chopped nuts to add extra texture and richness to your cake.
These ingredients come together to create a cake that’s moist, rich, and absolutely delicious. As you prepare your ingredients, make sure to measure them accurately for the best results. Ready to get baking? Let’s move on to the next step!
How to Make Homemade Chocolate Cake at Home
Now that we have our ingredients ready, it’s time to bring everything together and create that delicious homemade chocolate cake. Don’t worry—it’s easier than it looks, and I’ll guide you through every step. Let’s dive in!
Step 1: Prepare Your Pans and Preheat the Oven
First things first, preheat your oven to 350°F (175°C). This ensures the cake bakes evenly. While the oven heats up, grease two 9-inch round cake pans with butter or cooking spray, then lightly dust them with flour. This will help the cake come out of the pans without sticking.
Step 2: Mix the Dry Ingredients
In a large mixing bowl, whisk together the all-purpose flour, cocoa powder, baking powder, baking soda, and salt. Be sure to sift the cocoa powder to avoid any lumps and ensure a smooth batter. Once everything is well combined, set the bowl aside.
Step 3: Combine the Wet Ingredients
In another bowl, whisk together the granulated sugar, eggs, vegetable oil, whole milk, and vanilla extract. You want to make sure the sugar and eggs are well incorporated, so mix until the mixture is smooth and creamy.
Step 4: Bring the Wet and Dry Together
Slowly pour the wet ingredients into the dry ingredients, stirring gently as you go. It’s important not to overmix—just stir until the batter is smooth and fully combined. You’ll notice the batter is a bit thick at this point, and that’s totally fine!
Step 5: Add the Boiling Water
Here’s the secret to a super moist cake: carefully pour in the boiling water. The batter will thin out, but don’t worry—this is exactly what you want. The hot water helps to dissolve the cocoa powder and gives the cake its rich, smooth texture. Stir gently to combine, making sure the batter is nice and silky.
Step 6: Bake the Cake
Divide the batter evenly between your prepared pans. Smooth the tops with a spatula and pop them in the preheated oven. Bake for 30-35 minutes, or until a toothpick inserted into the center comes out clean. Your kitchen will smell heavenly as the cake rises and bakes to perfection.
Step 7: Cool the Cake
Once your cakes are done, take them out of the oven and allow them to cool in the pans for about 10 minutes. Then, carefully turn the cakes out onto a wire rack to cool completely. It’s important to let them cool fully before frosting, so the frosting doesn’t melt off.
Pro Tips and Variations for the Perfect Homemade Chocolate Cake
Now that you’ve baked your homemade chocolate cake, it’s time to take it to the next level! Whether you want to make the cake even more indulgent, customize it to your taste, or just learn some helpful tips, this section has everything you need to elevate your baking game. Let’s dive into some pro tips and creative variations.
Pro Tips for a Perfect Cake
- Use Room Temperature Ingredients: For the best texture, make sure your eggs, milk, and oil are at room temperature before mixing. This helps everything combine smoothly and evenly, resulting in a fluffier cake.
- Don’t Overmix the Batter: When combining the wet and dry ingredients, stir just until they’re incorporated. Overmixing can result in a dense cake, and we want it light and airy!
- Sift Your Dry Ingredients: Sifting the cocoa powder and flour before adding them to the batter ensures there are no lumps. This will result in a smoother batter and a more even crumb.
- Check the Oven Temperature: Every oven is different, so if you’re unsure, it’s a good idea to use an oven thermometer. Even a small difference in temperature can affect the texture and rise of your cake.
- Let the Cake Cool Completely: If you try to frost the cake while it’s still warm, the frosting will melt right off! Allow the cake to cool fully before adding your frosting.
Variations to Try
- Rich Chocolate Ganache: For an extra luxurious treat, top your cake with chocolate ganache. Simply melt dark chocolate with a bit of heavy cream, and pour it over the cooled cake for a glossy, decadent finish.
- Buttercream Frosting: If you love a classic buttercream frosting, whip up a simple one by beating together butter, powdered sugar, vanilla extract, and a splash of milk. For a fun twist, you can add a little coffee or cocoa powder to enhance the chocolate flavor.
- Add Mix-ins for Texture: For an extra layer of texture, try folding in chocolate chips, chopped nuts (like walnuts or almonds), or even a handful of mini marshmallows into the batter before baking.
- Make It a Layer Cake: Instead of baking the cake in two round pans, try splitting the batter between three pans for a more impressive, multi-layered cake. Don’t forget to frost in between the layers for a beautiful presentation!
- Gluten-Free Option: Want to make this cake gluten-free? Simply substitute the all-purpose flour with a gluten-free flour blend. Be sure to check the proportions for your specific flour blend, as they may vary.
- Fruity Twist: For a fruity variation, you can fold in some fresh berries (like raspberries or strawberries) into the batter for a sweet and tangy contrast to the rich chocolate flavor.
Serving Suggestions for Homemade Chocolate Cake
Now that your homemade chocolate cake is baked, frosted, and ready to be devoured, the next step is to think about how you want to serve it. Whether you’re enjoying it for a special occasion or just a sweet treat for yourself, here are some ideas to make your chocolate cake even more delightful:
1. Classic with a Scoop of Ice Cream
What’s better than a slice of chocolate cake? A slice of chocolate cake with a scoop of vanilla ice cream! The cold, creamy texture of the ice cream balances the rich, decadent cake perfectly. If you’re feeling extra indulgent, drizzle the whole thing with a little bit of chocolate syrup.
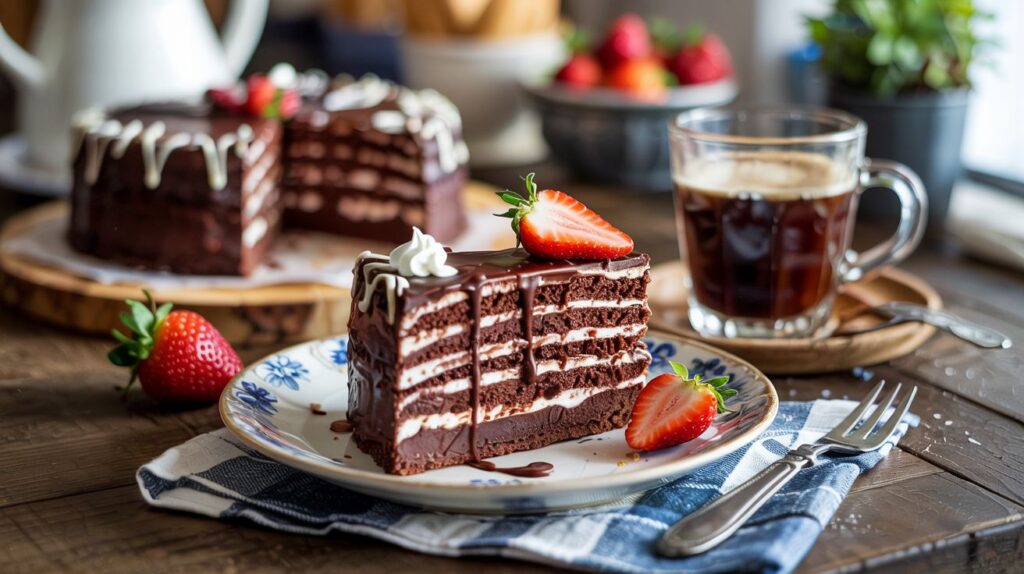
2. Fresh Fruit Pairing
For a lighter touch, pair your cake with some fresh fruit. Sliced strawberries, raspberries, or even bananas add a burst of freshness that complements the sweetness of the cake. You can also add a dollop of whipped cream to complete this fresh and fruity combination.
3. Whipped Cream and Berries
Top your chocolate cake with a generous swirl of whipped cream and a handful of fresh berries. The light, airy whipped cream adds a lovely contrast to the dense, rich chocolate cake, while the berries provide a pop of color and a tangy kick.
4. Layer It with More Frosting
If you love frosting as much as I do, don’t be shy—add extra frosting on top for an extra sweet touch. Whether you’re using buttercream, ganache, or even a cream cheese frosting, a second layer of frosting is sure to take your cake over the top.
5. Serve with Coffee or Tea
A slice of chocolate cake pairs wonderfully with a hot beverage. Whether you prefer a cup of coffee or a tea, the warmth of the drink and the rich chocolate flavor of the cake make for a cozy, comforting combination.
6. Turn It Into a Celebration Cake
If you’re celebrating something special, take your cake to the next level by decorating it with colorful sprinkles, edible flowers, or even chocolate shavings. It’s a simple way to add a festive touch to any occasion, from birthdays to holidays.
7. Ice Cream Cake Variation
Feeling adventurous? Transform this chocolate cake into a homemade ice cream cake! Slice the cooled cake into layers, then sandwich it with your favorite ice cream flavor. Freeze the entire cake and frost it once solid. This is a fun twist that will surprise and delight your guests.
8. Serve as a Cake for Breakfast
Why not make your chocolate cake a part of your morning ritual? Serve a small slice with a cup of coffee or milk. It’s a fun way to treat yourself on a weekend morning or special occasion.
Conclusion: Your Ultimate Homemade Chocolate Cake Awaits!
Congratulations, you’ve successfully baked a homemade chocolate cake that’s sure to impress! Whether it’s for a special occasion, a weekend treat, or simply to indulge your sweet tooth, this cake is a guaranteed crowd-pleaser.
With its rich, moist texture and irresistible chocolate flavor, you’ve created a dessert that’s as satisfying as it is delicious. But the fun doesn’t stop there! With all the serving suggestions and pro tips I’ve shared, you can take this simple recipe and make it your own. Experiment with different frostings, add your favorite mix-ins, or serve it in new and exciting ways. The possibilities are endless.
Why You’ll Love This Recipe:
- Simple Ingredients: Most of the ingredients are pantry staples, making it easy to whip up this cake whenever the craving strikes.
- Customizable: With so many frosting and topping options, you can easily adapt the cake to suit your personal preferences or the occasion.
- Impressive Results: Despite being simple, this cake has a rich, decadent flavor that will wow your family and friends.
FAQs
If you’ve made this homemade chocolate cake, you might have a few lingering questions or want to make sure everything goes smoothly. I’ve gathered some of the most common FAQs to help guide you through the process. Let’s clear up any uncertainties so you can enjoy your cake to the fullest!
1. Can I make this cake ahead of time?
Yes! You can easily make this cake ahead of time. Once baked and cooled, store the cake layers in an airtight container at room temperature for up to 3 days. You can also freeze the cake layers for up to 3 months. Just be sure to wrap them tightly in plastic wrap and foil. When you’re ready to serve, thaw and frost as usual.
2. Can I substitute ingredients?
Absolutely! If you don’t have all the ingredients on hand, here are a few substitutions you can try:
- Butter: If you prefer, you can substitute the butter with vegetable oil or melted coconut oil for a different texture.
- Milk: If you’re out of milk, buttermilk or a non-dairy alternative like almond milk or soy milk works well.
- Flour: For a gluten-free version, simply replace the all-purpose flour with a gluten-free flour blend. Make sure to check the ratio if you’re using a specific blend.
3. Can I make this cake into cupcakes?
Yes, you can absolutely make cupcakes with this batter! Just line your muffin tin with cupcake liners and fill them about 2/3 full with the cake batter. Bake at 350°F (175°C) for 18-20 minutes, or until a toothpick comes out clean. You’ll end up with perfectly portioned chocolate treats!
4. How do I know when the cake is fully baked?
To check if your cake is done, insert a toothpick into the center of the cake. If it comes out clean or with just a few crumbs clinging to it, the cake is ready. If it comes out with wet batter, give it a few more minutes and check again.
5. Can I make this cake in different pan sizes?
Yes! You can adjust the pan size, but be aware that the baking time might vary:
- For 9×13-inch pans, the cake will bake a bit faster, around 30-35 minutes.
- If you’re using smaller round pans, like 6-inch pans, the baking time will be shorter, so start checking around 20 minutes.
6. Why is my cake dry?
If your cake turns out dry, it could be from overbaking or using too much flour. To prevent this, measure your flour properly—scoop the flour into the measuring cup and level it off with a knife. If you’re using a kitchen scale, 1 cup of flour should be about 120 grams.
7. Can I use a different frosting?
Of course! This cake pairs beautifully with a variety of frostings:
- Cream Cheese Frosting: For a tangy contrast to the rich chocolate.
- Whipped Cream: Light and fluffy, perfect for a softer topping.
- Peanut Butter Frosting: If you’re a peanut butter fan, try this creamy, nutty option for a fun twist.
8. How do I store leftovers?
Store any leftover cake in an airtight container at room temperature for up to 3 days. For longer storage, refrigerate the cake for up to a week. You can also freeze individual slices for up to 3 months. Just wrap them tightly and defrost when you’re ready for a treat!
These FAQs should help clear up any questions and make sure you have a smooth, enjoyable baking experience. Don’t hesitate to get creative with the recipe or try different variations to suit your taste. Happy baking, and enjoy your homemade chocolate cake!
Homemade Chocolate Cake Recipe Recap
Here’s a quick recap of your Homemade Chocolate Cake recipe to ensure you have all the essential details at your fingertips. Let’s make sure you’re all set to bake this delicious dessert!
Recipe Details:
- Prep Time: 15 minutes
- Cook Time: 30-35 minutes
- Total Time: 50-55 minutes
- Servings: 8-10 slices
- Calories per Serving: ~350 calories (depending on frosting and portion size)
Nutrition Information (Per Serving):
- Calories: 350 kcal
- Fat: 18g
- Saturated Fat: 10g
- Carbohydrates: 45g
- Sugars: 32g
- Protein: 4g
- Fiber: 2g
- Cholesterol: 45mg
- Sodium: 250mg
- Potassium: 150mg
(Note: Nutrition may vary based on specific ingredients used, such as frosting or alternative ingredients.)
Categorize the Recipe:
- Course: Dessert
- Cuisine: American, Global
- Diet: Vegetarian
- Method: Baking
- Keyword: Homemade Chocolate Cake, Chocolate Cake, Moist Chocolate Cake, Easy Chocolate Cake
- Skill Level: Beginner to Intermediate